Friday, December 28, 2012

You Are My Sunshine Baby Shower

Several months ago I threw a "You Are My Sunshine" themed baby shower for my friend. I took a bunch of photos of the ideas I came up with for the theme so that I could share them here, and then I forgot about them! I was a vendor at a craft festival on the same weekend as the shower, so I did as much of the work ahead of time as possible. It was an appetizer and dessert shower, so I was able to keep the menu pretty simple.

The first thing I made was a wreath for the front door. I wanted to make something that the mom-to-be could also use on her front door after the baby arrived. It's a straw wreath form wrapped in yarn. The clouds and sun are made out of two layers of felt, and stuffed with a tiny bit of poly-fill to give them some body. I stitched the felt with embroidery floss, and hot glued them to the wreath. I printed the "It's a boy" banner onto kraft card stock, cut it out with an xacto knife, and hot glued it to the wreath.


While I was making the wreath, I also made the cake topper to match. The banner and felt pieces are smaller than the ones on the wreath, and aren't stuffed with poly-fill, but are otherwise the same.  The banner is glued onto two wooden skewers, and I slipped skewers in between the layers of felt on the sun and clouds.


Next I made tissue paper pom poms. There is a tutorial on the Martha Stewart website that explains how to make pom poms. They are somewhat time consuming, but easy to make. I assembled all of the pom poms I was using in advance, but didn't fluff them until I hung them up. I put up all the decorations several days ahead of time since I was busy with the craft festival. My daughter thought it was awesome to have pom poms hanging all over the house.


Since I don't have a color printer, I designed two-sided post card sized invitations and had them digitally printed at overnightprints.com. I tried to make it look like it was felt, to match the cake topper. They were mailed in kraft paper envelopes.


My address and phone number have been removed, but you get the idea

I pulled the labels off of the bottled water, and printed new labels with the artwork from the invitation combined with the banner from the cake topper. They were printed in black on text weight kraft paper.


The favors were bags of lemon drops, with a cloud shaped tag tied to each one that says "Thanks for dropping in." I couldn't find a cloud shaped punch in time to make these, but I know that one exists, which would save a ton of time cutting out the little clouds. I also cut out little rain drops from glitter scrapbook paper and glued them to to clouds.


Since I don't have an ice bucket, I took a small galvanized bucket that I had laying around and wrapped it in yarn to match the wreath. It actually worked really well, the yarn kept the bucket insulated so the ice didn't melt.

We had lemonade and water for beverages. I never know if it's appropriate to have alcohol at a baby shower, since the mom-to-be can't have any, so I opted not to. I guess it all depends on the type of crowd you are serving.


For appetizers, I served deviled eggs, pimento cheese sandwiches, broccoli salad, shrimp cocktail, and stuffed mushrooms (which didn't make it into the photo). I made the broccoli salad and stuffed mushroom filling 2 days ahead of time, and the deviled eggs and sandwiches the night before. All I had to do on the day of the shower was bake the mushrooms and arrange the shrimp.


I made shrimp shots in plastic shot glasses (nice plastic, not like a solo cup). First I poured in a little cocktail sauce, then I hung shrimp on the rim and garnished them with parsley.


For desert, we had lemon pie shots, spice cake, and creamsicle cake pops. I made the cake pop filling ahead of time, rolled it into balls, and froze it. I let them thaw in the fridge the day before the party, and dipped them in candy coating. The lemon pie crust and filling were made 2 days ahead. I topped them with meringue the morning of the shower and toasted them just before the guests arrived. The cake was baked and frosted the day before the shower.


The cake pop stand is a piece of florist foam, covered in paper and then wrapped in yarn to match the wreath and ice bucket. To make the creamsicle pops, I baked a yellow cake and then poked holes in it with a wooden spoon while it was still in the pan. I poured orange jello over it, and put it in the fridge. The next day I crumbled the cake and mixed in vanilla frosting and a little orange extract and food coloring because it didn't taste creamsicle-ish enough for me. I was using gluten free cake, so that may have affected the flavor, or lack of flavor. Then the sticks were inserted and they were dipped them in vanilla candy bark.


The lemon pie shots were assembled in 2 oz glasses from Ikea. The bottom layer is a graham cracker crust, topped with lemon pie filling and meringue. I put all of the glasses into a baking dish and toasted them in the oven, but you could also toast them with a torch.


The games we played were:
-Mad libs

-Name the baby (everyone gets a sheet of paper and writes down as many names for baby animals as they can think of- puppy, kitten, duckling, etc.)

-Don't say baby (everyone gets a clothes pin and if someone catches you saying "baby" then they can take your pin. The person with the most pins at the end of the shower wins)
I don't have a photo of them, but I used mini clothes pins and glued on rain drops that I had cut from glitter scrapbook paper.

- Guess the size of mommy's tummy (pass around a roll of streamers and have each person cut a piece that they think is the same size as the mom-to-be's tummy is. Then, wrap a piece around the mom-to-be and cut it to the exact size of her tummy to compare with the others. The closest guess wins)

The prizes for the games were blue candle holders with cloud tags that said "you make me happy when skies are gray".


I had planned on getting the mom-to-be a corsage with a sunflower, but I sent my husband to the store to pick up the balloons for the mailbox, and totally forgot to tell him about the flowers. I whipped up a felt flower corsage for her instead of going back out to the store. If I had thought about it, that's probably what I should have done to begin with.


Thursday, December 13, 2012

Tuesday, December 4, 2012

Indie South Fair

Microwave Girl will be be the Indie South Fair (formerly the Athens Indie Craftstravaganzaa) in Athens, GA this Saturday. Click here for more info.

I'll be sharing a booth with Little Yellow Yarrow, who sells aromatherapy oils. Stop by and see us if you are in town!

Wednesday, November 21, 2012

Free Gift With Purchase

I have a special promotion running in my Etsy shop for Black Friday / Small Business Saturday / Cyber Monday.  Receive a free Christmas ornament for every $10 spent in my shop, just specify in the notes to seller what color you want. 


Thursday, November 15, 2012

A very crafty weekend

I just got back from dropping off my inventory for The Paideia School's "Art Visions" fine art and craft sale (more info here). The sale is this weekend, Saturday from 10 am to 5 pm, and Sunday from noon to 5 pm.

I wish that I had time to stop by Art Visions and check it out. What I saw when I dropped off my stuff looked really nice, but this weekend is also the Indie Craft Experience (more info here). ICE is my most favorite craft show of all time. It's always fun, and full of talented vendors and friendly shoppers. ICE is also Saturday and Sunday, 11am to 6pm both days. Stop by and say hello!


Wednesday, November 7, 2012

Lunch Note Giveaway!

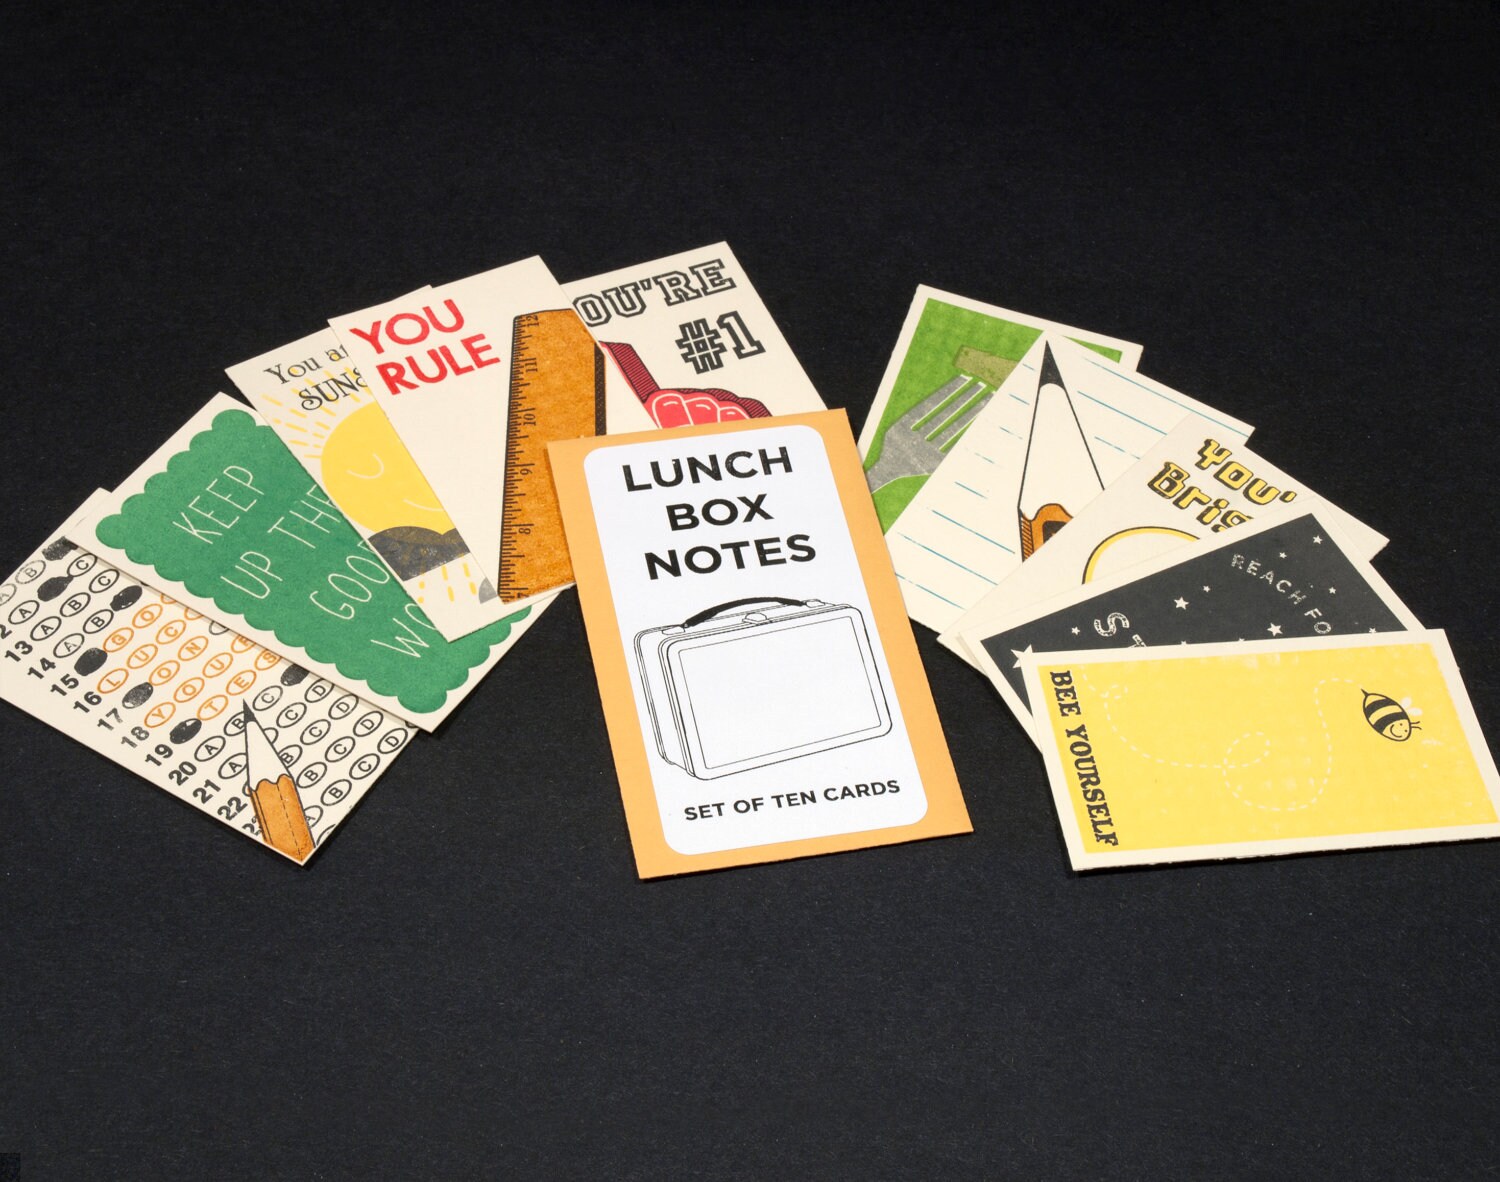
I'm giving away a set of Lunch Box Notes through my facebook page. Click here to go to the contest page. All you have to do is click to enter the contest, and "like" my page. If you are already following Microwave Girl on facebook, you can still enter to win.


Click here to see the full item description, plus more photos, in my shop.

Tuesday, October 30, 2012

Holiday Traditions

I'm gearing up for the Marist School's Holiday Traditions arts and crafts sale, which is happening this Saturday, November 3rd. Stop by and see me if you are in town, I'll have a booth in the gym. Click here for more info.

Friday, October 19, 2012

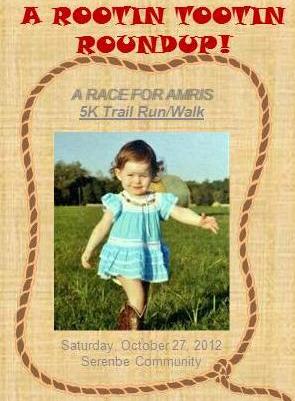
Rootin' Tootin' Roundup 5K


A friend of mine is helping to organize a 5K in Palmetto, GA to benefit a little girl who is undergoing cancer treatment. Here is a little info from their website:
"Amris Bedford, a spunky two year old country girl, was diagnosed with a very rare and aggressive brain cancer known as AT/RT.  Amris is receiving treatment at St. Jude Children's Research Hospital, where she will be for the next 6 months.  Come out and run for a good cause!!!  Proceeds from this run will be donated to her family to help cover expenses during this difficult time."
If you are a runner and want to participate, then click here to go to their website to register. If you aren't a runner and want to participate, you can register as a phantom runner, you don't even have to show up. 
They also have a facebook page (click here) for the event. 

Monday, October 15, 2012

Microwave Girl Shop Update!

I seem to have gotten stuck in a recipe rut again, for lack of a better word. What can I say, I like to eat good food, and I like to share good gluten free recipes. Some gluten free food is just horrible, so when I make something that tastes "normal" to me, I feel like I have to share it with the world. But enough about food.

I have finally updated my etsy shop! I can never seem to find the time (or motivation) to photograph my  work, but I forced myself to do it this past weekend. I am pleased to announce that there are 5 new items in my shop as of today.

I have two new cards: Olive Juice and Heart Hands.


I finally got enough Lunch Notes printed to be able to put some for sale online.


 And last, but not least, two thaumatrope designs: Lightning Bugs in Mason Jar, and Sizzling Bacon.
Both sides of the Lightning Bug thaumatrope

My somewhat successful attempt at photographing what your eye sees when
you twirl the strings between your fingers

Both sides of the Bacon thaumatrope

This turned out a little better than the lightning bugs in motion, the bacon
and pan are both facing the camera at least.

Tuesday, September 25, 2012

Need something to do this weekend?

Come see me this Saturday at the Riverview Landing Fall Festival. I've never been to this festival before, but it looks like fun! I don't know if June is old enough to enjoy the festivities, but hopefully her daddy will bring her by to see me anyhow.

This is a two day festival, with music on Friday night, and family activities and an artist market (where I will be) on Saturday.


Click here for more info on Saturday's festival, or click here for directions.

Thursday, September 20, 2012

Chicken Kabobs


After doubling the recipe, I was able to divide it up into three meals
(for two adults and a toddler), but the chicken breasts I used were huge.
These two bags are ready to go in the freezer.

Friday, September 14, 2012

East Atlanta Strut

The East Atlanta Strut is tomorrow ATL people! I'll have a booth there, so stop by and see me. This will be my first time using my new booth display in an tent. I'm excited to see how it all looks set up.

Click here for more info.

Thursday, September 13, 2012

DIY Renovation: Creating a Plan

Plan your work and work your plan. Those are words to live by, or work by at least.  The first step in our renovation was creating a floor plan.  When my husband and I were searching for a home to buy, the area we were looking in was all old houses. No matter what house we bought, it would need work. We were given the advice to always go for the house with more square feet. When we were deciding between our top two options, we did just that.  The first house looked more finished, but was smaller.  The house we bought looked like a hot mess, but we bought it anyhow. Both houses actually started out with the same floor plan, since the majority of the houses here were identical when they were built.

My neighborhood was built in the 1940's. The houses were almost all 2 bedroom, 1 bath houses with a living room, dining room, fire place, screen porch, and eat in kitchen. Most of the houses have had additions over the years. Mine has had two. Unfortunately, when those additions were made, the goal seemed to have been to simply make a bigger house. There was no regard to what the additional rooms could be used for, or the traffic flow through the house. The original back porch of the house had been used at the foundation for the first addition, and a new back porch was added next to it.  The next owners decided that one bonus room wasn't enough, and used the new porch as a foundation for another addition. They did not add a new porch. The biggest problem was that in order to get from the back of the house to the front of the house, you had to walk in a big U shape through the two bonus rooms, the kitchen, the hallway, and then the living room. If we were leaving from the back door and couldn't remember if we had locked the front door, it was faster just to run around the outside of the house and check than it was to walk back through the inside.

It took my husband and I a long time to agree on a floor plan. We knew we wanted to have a 3 bedroom, 2 bathroom house with a new kitchen, but we couldn't agree on where those things should go. I spent hours in front of the computer almost daily drawing every possible layout. Finally, after months of deliberation, we nailed it down.

This is the original floor plan:

Click to enlarge


Please excuse my simplified drawing. I originally only created it for me to be able to work through different floor plans, so while I did draw out where the windows were, I didn't bother to draw any doors.


This was the floor plan when we bought it:


Click to enlarge


In addition to the long path from the front of the house to the back, and the kitchen being in the middle (which turned out to be really annoying for a number of reasons), the screen porch had been turned into a bedroom. It didn't have a closet, and you had to either go through the living room or another bedroom to get to it. It wasn't exactly private.

Another major problem was the kitchen layout. Once the toaster oven was on the counter and the canisters were put out, there was no counter space left. Since the original pantry had been sacrificed to add more counter space, the pantry had been moved around the corner into the hall linen closet. The washer and dryer were also crammed in the tiny space, sort of. The wall between the dining room and kitchen had been cut down to a knee wall to open up the space before the last owners bought the house. The space left in the kitchen wasn't wide enough to fit a washer and dryer, so they knocked down the knee wall to make more room. They patched the floor with a scrap piece of plywood. Everything about this room was a mess.


This is what the house looks like today:


Click to enlarge

This is the only drawing where there aren't supposed to be doors in every doorway. The wide doorways between the sun room, dining room, hall, and living room are all open.

While I realize that my house isn't perfect, it's about a million times better than where we started. There are a few things that I would do differently if I had to do it all over again, but overall I think it turned out well.

Sunday, September 9, 2012

DIY Dryer Balls

This blog has moved! Click here to view the tutorial.

Wool Dryer Balls


My wool ball sausage, after the first wash cycle


The finished dryer ball size compared with my 1 remaining plastic dryer
ball and a tennis ball